Item Options
Related Links: 10-Step Guide on Setting Up Ecommerce | Item Management PageOverview
Item options allow a site owner to:
- Offer customers a choice from a list of selections
- Add a text field which allows a customer to type in actual information needed to complete the purchase
If the text field option is used, the customer will see a named label (such as "Special Instructions:") with an empty text area below. A customer purchasing the product will be able to type comments, special instructions, and/or specific details pertinent to the purchase.
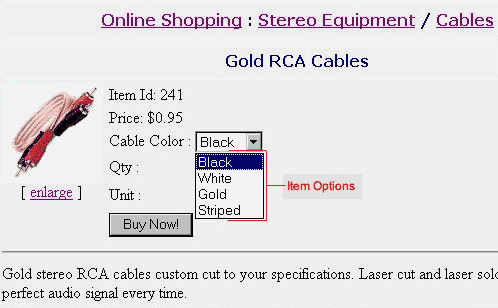
As an example, the options feature can be used to offer customers a choice of colors or sizes, or a text field can be created which allows a customer to type in comments. Any number of options can be set up, as long as the choices do not affect the selling price of the product.
Use the item option administration page to add, delete or modify options associated with an item. This feature allows customers to select non-price dependent options from a pre-defined list of choices.
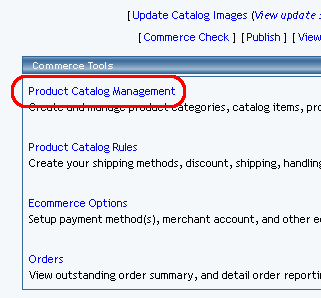
Navigation: Click on the main "Ecommerce" link at the top of any main administration page. Click on the "Product Catalog Management" text link to load the product catalog management page.

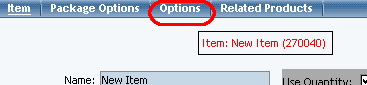
Access the item management page by either creating a new item or by selecting an item to edit from the item drop down menu. The item management page will load in a new browser window. Click on the "Options" text link located at the top of the administration window.

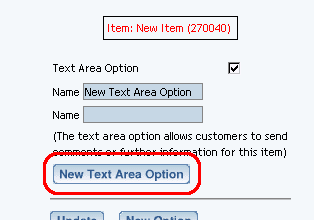
To add a small text area to the item, activate the feature by clicking the check box next to "Text Area Option". Enter the name to display above the text area in the space provided. Click on the "Update" button to save the changes.
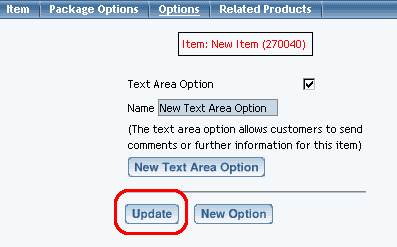
If necessary, more than one text area may be added. To add another text field, click on the "New Text Area Option" button, and repeat the steps above.
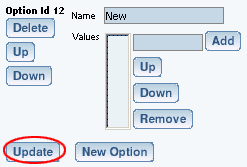
To create a new option, click on the "New Option" button. Once the page reloads, replace the default option name "New" with any desired name (example: "Color"). In the empty field next to "values", type in the first value (example: "Red"), and click the "Add" button. Add as many values as desired by repeating this process.
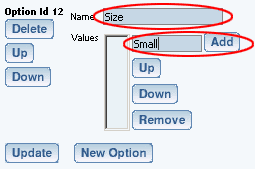
For each option created, a new option administration area is populated on the page.
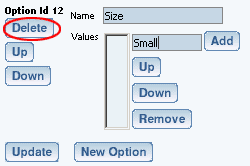
To delete an existing option set, click on the "Delete" button located beneath the option Id number.
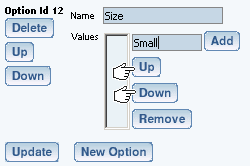
To change the order of any option set, click on the "Up" or "Down" arrow button located beneath the "Option Id" number. Repeat this process until all option sets appear exactly as they should be displayed in the product catalog.
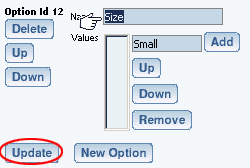
To change the name of any option set, type over the existing name, and click the "Update" button.
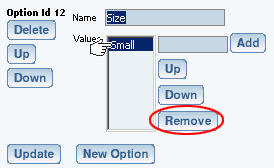
To delete an existing value within an option set, highlight the value and press the "Remove" button located to the right of the value list.
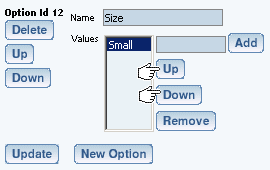
To re-order any values within an option set, highlight the value to move by clicking on it from the list of values. Use the "Up" or "Down" arrow button to move the value. Repeat this process until the value list is ordered as it should be displayed in the catalog.
To change the name of any value used in an option set, delete the value, then add a new one.
Click the "Update" button to apply any changes before closing the item options window.
Back to the Top of the Page
10-Step Guide on Setting Up Ecommerce
Back to the Previous Page