Ecommerce Component
Catalog
Related Links: How to Add a Component | How to Modify a Component | Editing BasicsOverview | Adding a Catalog Component | Modify a Catalog Component | Items | Categories | Groups | Packages
Overview
You use the catalog component along with the cart component and your catalog page specification in the Product Catalog Management area of the Administration to control the display of your online online catalog. Only pages that have a catalog component can be used as the catalog page for your site.
The catalog component acts as a placeholder for where the catalog information will appear on the catalog page. Of course, you will add other kinds of components to your catalog page such as a navigation component, images, text, etc. These components will appear on every page of the catalog, in addition to the actual catalog information.
The catalog component includes options to control how the various kinds of catalog entities in your catalog are displayed. The display options are provided for: The catalog component also sets general catalog display options, including which page is to serve as the "cart" layout. The page that you specify must include a cart component to be eligible.
Adding a Catalog Page and Component
First, add a new page to serve as your catalog page. Click the "Edit" link on the Website Editor - Edit Page menu. The page editor window will appear. The catalog component can be added directly as an element to the page, or within a pre-existing table. Click the location on the page where you would like for catalog information to appear. Then add component by clicking "Other" and then "Catalog".
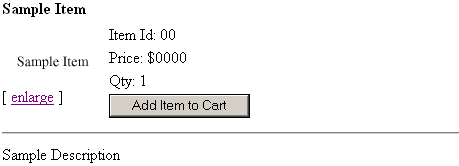
Once the component is added, the page will refresh with a sample image in the location where the catalog will display.
Back to the Top of the Page
Modifying the Catalog Component
To edit the catalog component, click on the sample catalog image from the page modifier. Choose "edit" from the component pop-up menu. The catalog component editor will load in a new browser window.
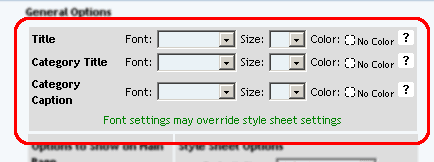
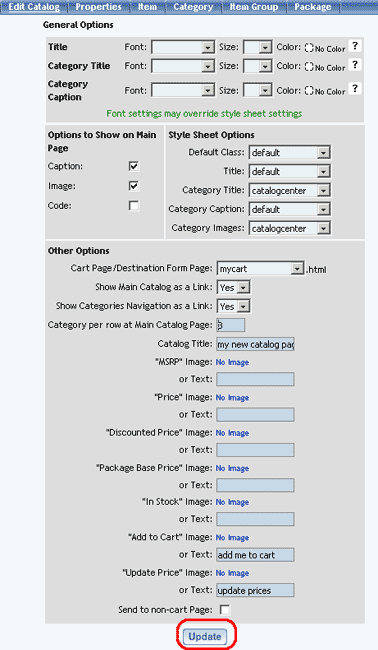
The Title, Category Title, and Category Description font styles may be modified by changing the default values next to each item.
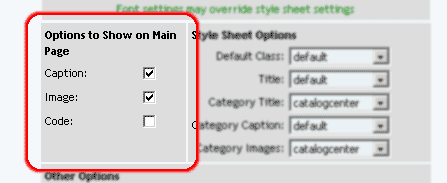
The descriptions and images may be hidden or displayed by checking the appropriate box. These two selections only control the layout of the main catalog page.
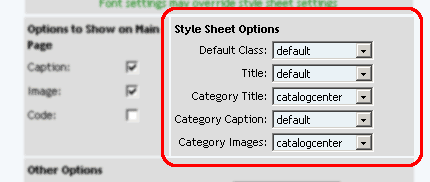
Style sheets for the main catalog page may be applied. See the section on style sheets for further information.
If you want to show a link to the top-level of the Product Catalog, select "yes" in the drop-down menu next to the text "Show Main Catalog Link".
Specify how many categories you would like to display in a row for the top-level of the Product Catalog by inputting numbers in to the text field next to the text "Category per row at Main Catalog Page".
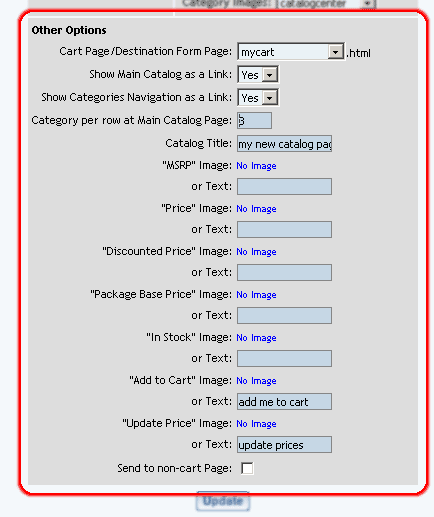
The Catalog Title can be customized by typing a new title in the space provided. The title acts as the primary heading for the catalog page.
Before a customer can access the shopping cart, a shopping cart page must be selected. Select a page that contains a shopping cart component from the drop-down menu "Cart Page/Destination Form Page" provided. If necessary, create a shopping cart page before proceeding. If you want visitors to be sent to a quote page that has a form, you would select that page here and checkmark the option "Send to non-cart Page" that is listed further down the window.
The text that displays on the "MSRP", "Price", "Package Base Price", "In Stock", "Add to Cart", and "Update Price" buttons may be customized. Type the text to display in the fields provided.
To use a custom image for the "MSRP", "Price", "Package Base Price", "In Stock", "Add to Cart", and "Update Price" buttons , click on the "No Image" text under the button to change. The image selection administration page will open in a new browser window.
To change an existing custom image used for the "MSRP", "Price", "Package Base Price", "In Stock", "Add to Cart", and "Update Price" buttons, click on the current image name. The image selection administration page will open in a new browser window.
If "Send to non-cart Page" is selected, you will see the following screen:
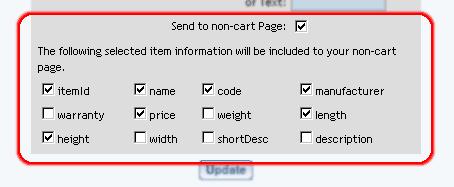
Checkmark all of the fields that you want to be sent to your form page. The data will not display on the form page, but the data will be sent along with the form when the form gets submitted.
To apply any changes made, press the "Update" button located at the bottom of the administration page.
Back to the Top of the Page
Items
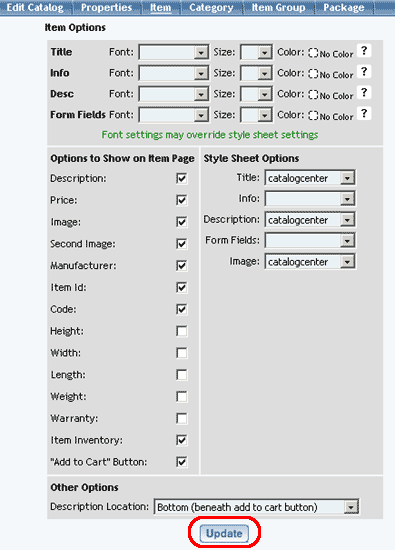
From the main catalog component editor, click on the "Items" text link at the top of the page.
The display of the actual product items within the catalog may be customized by changing any of the available options.

Objects such as an item’s image or price can be hidden or shown by clicking on the appropriate check box.
To use the product catalog as an image gallery only, hide the "price" and the "add to cart button".
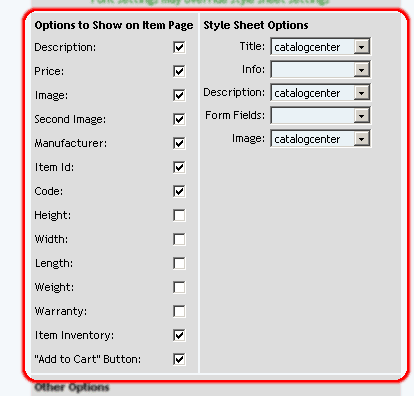
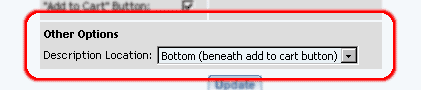
To move the description around the Add to Cart button, select in the drop-down menu for the section "Other Options".
When finished, click the "Update" button located at the bottom of the administration page.
Back to the Top of the Page
Categories
From the main catalog component editor, click on the "Items" text link at the top of the page.
How actual product categories are displayed within the catalog may be customized by changing any of the available options.
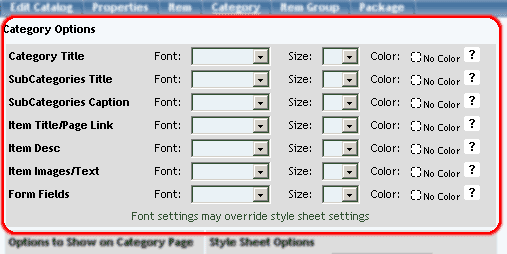
Objects such as images or prices can be hidden or shown by clicking on the appropriate check box.
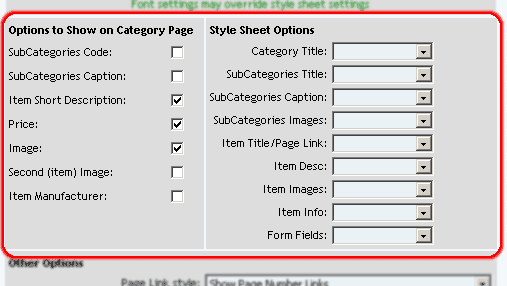
The image spacing and alignment can be modified by changing the selections from the drop-down menus provided. See the section on aligning images for further information.
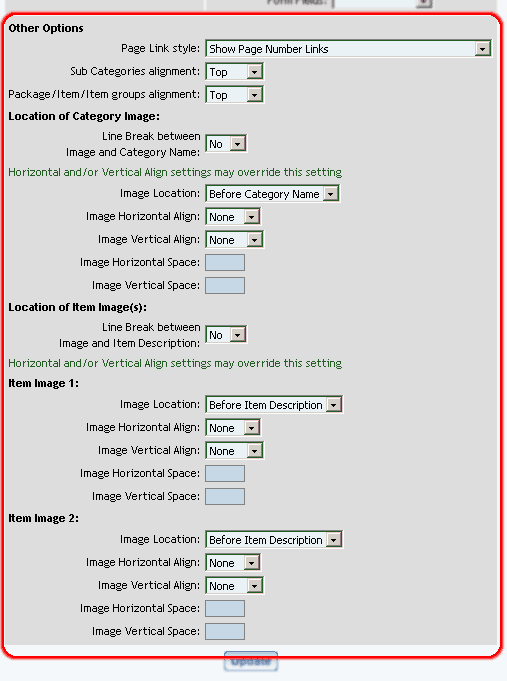
When finished, click the "Update" button located at the bottom of the administration page.

Back to the Top of the Page
Item Groups
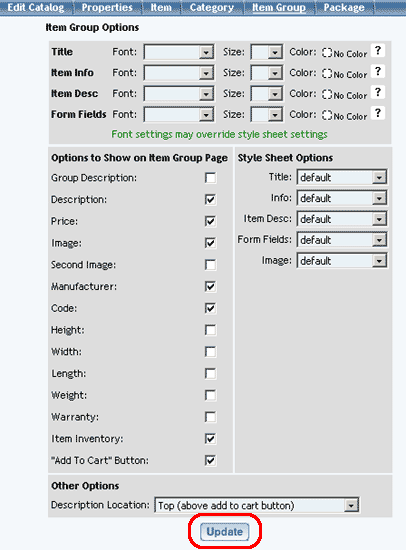
From the main catalog component editor, click on the "Item Groups" text link at the top of the page.
How item groups are displayed within the catalog may be customized by changing any of the available options.
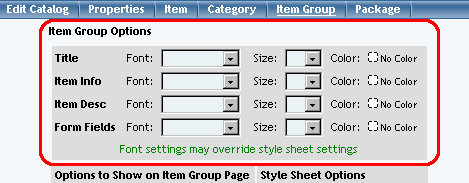
Objects such as an item group’s image or price can be hidden or shown by clicking on the appropriate check box.
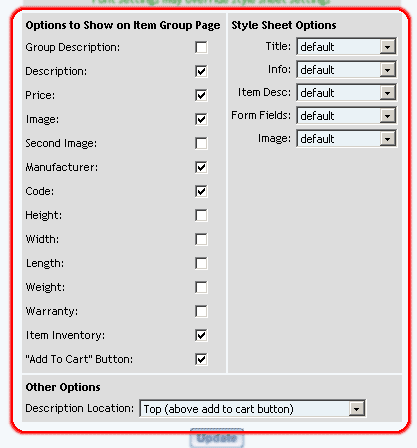
When finished, click the "Update" button located at the bottom of the administration page.
Back to the Top of the Page
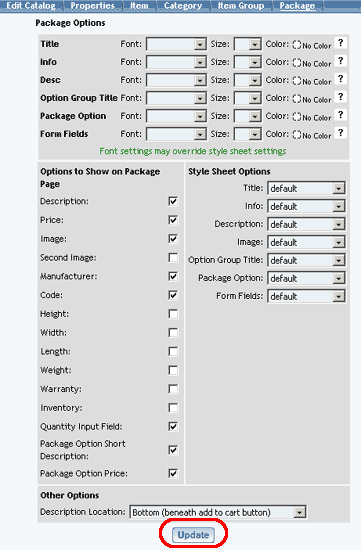
Packages
From the main catalog component editor, click on the "Packages" text link at the top of the page.
How packages are displayed within the catalog may be customized by changing any of the available options.
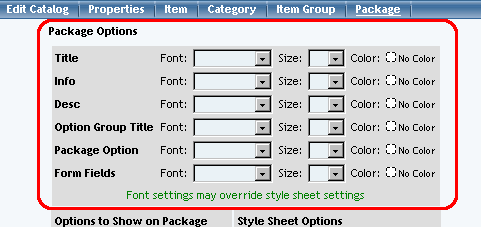
Objects such as a package’s image or price can be hidden or shown by clicking on the appropriate check box.
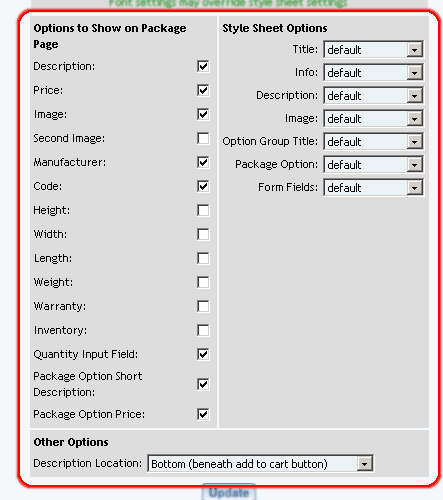
When finished, click the "Update" button located at the bottom of the administration page.
Editing Basics
Back to Previous Page